Sunday, March 5, 2017

Caught in a Trap

March 5, 2017

We are currently looking at everything to finish up before we get the car off the wood stand it's been on for about a year. The kit was delivered April 3, 2016 and it would be nice to drive it around - of course without a body - before 12 months of building. Our trap is now that we are looking everything over and finding things we aren't comfortable with and have decided to re-engineer in some cases. We also are trying to avoid adding to the budget so we are spending a few extra cycles thinking about the most cost-effective way to accomplish. Here are a few examples and an update on a previous redo.

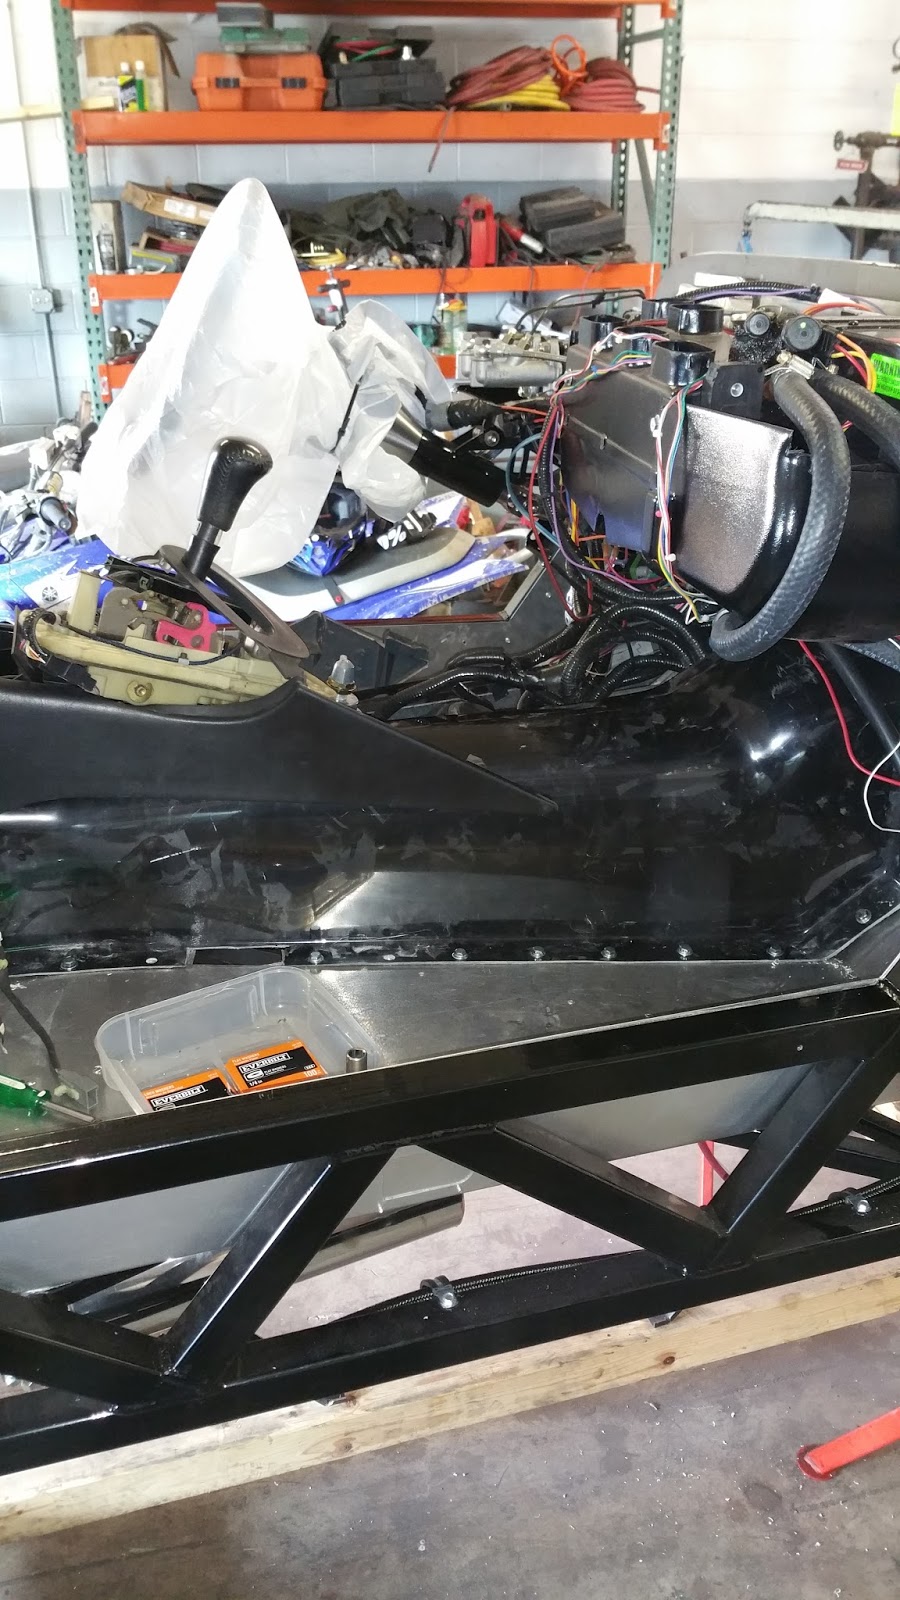
First off the update. We decided to move the battery disconnect and remote battery terminals from the trunk of the car since we were concerned about a rear end collision and the proximity of a live battery cable very near the fuel tank. We moved the disconnect switch to the center console area so when we leave the car we can just disconnect it and the switch will be hidden, but easy to get at if you know where it's at. A poor man's security system and easy to arm and disarm. 

Also,  we got the emergency brake installed which is in the photo below - the disconnect switch is circled.


We moved the remote battery charging terminals to the front of the car. The battery location is in the rear and has no real access to charge, this will allow us not to have to take the car apart to give it a jump start. We are worried since it's a drive every once in a while vehicle, and the chance of a low battery is increased by just sitting; there are a few vampire circuits         (always on like the computer and other memory setting saving circuits) that can drain a battery. Another reason to have a disconnect switch to disconnect the battery is if we know there is a long period without running and recharging the battery. Of course everytime we fully disconnect, the computer needs to relearn the emissions and smooth running settings, but that is better than a dead battery or a stolen car.

For the remote terminals, we made a simple aluminum bracket and then coated it with rubber paint so the battery cables don't spark in case we touch them to the plate when setting up the charging.


After installing the trans tunnel and seeing how little room is available for the accelerator pedal, Jake suggested we look at moving the brake pedal to where the clutch pedal would be. Since we have an automatic this made a lot of sense. The devil is always in the details and it wasn't a simple moving of a pedal. The bracket for the pedal needed to be hacked up and a new mounting plate fabricated. After the work, we are very happy with the result. Great idea from Jacob! We also noticed without the brake pedal on the right side of the steering column we could relocate the steering shaft to a more direct location where the brake pedal was. We could also do this since the headers are smaller and provide the room past the firewall to accommodate the more direct path. The way the steering shaft was routed and the extreme turns it took was making turning a bit more strenuous, with this new path it should turn much easier as the force will be in a more direct path and not needed to turn a 135-degree universal joint turn.

We have completed the brake pedal movement and will rework the steering over the next week or two. Check out how much room we have for the gas pedal.


The hole will need to be redone 3-4 inches to the right on the other side of the frame brace, but that should be easy. We will make an aluminum plate to cover the current hole - a much better solution for us and saves us from a $1200 power steering unit. 

We are also trying to use the donor vehicle wheels until we have the body work done and the car painted this way we won't have to worry about getting paint on the new tires and wheels. Similar to painting a room that you know you will replace the carpet. Like everything, there is a bit of an issue with this. The lincoln wheels are 16-inch rims with a bolt spacing of 4.25 inches, the mustang wheel hubs have 4.5 inch spacing. The fronts have 11-inch rotors and the rears have 13-inch rotors. Getting used rims and tires with a 4.5 inch bolt pattern cast about $50 each, but just getting a spacer that changes the bolt pattern are $20. We found that works for the fronts, but the rears although they fit the calipers rub. We are going to grind the rims just a bit to eliminate the rubbing, something we will try before we get 17 or 18-inch tempory wheels.  below is a shot of the spacer and the wheels on the car - remember they are temporary while we roll it around the shop and do the body work.


Saturday, February 25, 2017

A Change of Plans

February 25, 2017

At this point in time, we originally would be in South East Asia and not returning until late March. Due to the travel ban, and JoAnn being a green card holder, we were concerned with being out of the country as the government sorts everything out. You never know and being safe is better than being sorry.

Therefore I was able to steal a few more days to make some progress on the hot rod. We are now trying to get it in shape to drive around before we start fitting the body, doors, hood and trunk. 


We also made some changes and redid some things we weren't all that happy with. For example, we changed the master cylinder lines and relocated the reservoir to the engine compartment. See before and after pics. 


When we changed out the headers, we thought we had to give up on the EGR( exhaust gas recirculation) because the EGR pipe was too short and the connectors were different sizes. Larry came up with the idea to chop up a mustang EGR pipe and lengthen it. This worked and we used a flexible pipe so it was able to be routed better. Now we are back to having the car meet emissions and in the end, run better without reflashing the computer. All the headaches with PATS is paying off.


We also then added a dummy rear oxygen sensor post catalytic converter to fool the computer since we removed the catalytic converter and the computer is only looking for a signal acknowledging a converter is present.  We installed new front oxygen sensors because the computer uses this information to determine if the engine is running rich (too much fuel) or lean (too little fuel).

We also installed the transmission tunnel, the accelerator pedal area is tight - we may have to move the brake pedal - we will test it out once we have the seats in.


Lots of wire loom in front of the shifter  - our plan is to fabricate a center console with a tablet ( like a Tesla, only android) to cover this up, house the speakers and the air con controls and have the battery disconnect switch in a compartment that covers. We are working out all the wiring for that now.

Monday, February 6, 2017

Routing the Coolant Hoses

February 6, 2017

The engine cooling system on our engine is not standard. Let me explain. Most engines have a thermostat that keeps the water in the engine circulating until it gets to between 175F and 200F degrees. Then it opens up and the coolant flows from the top of the engine into the upper radiator hose to be cooled. This is so that in cold weather the engine can warm up quicker for optimal performance, better emissions, and fuel economy while running below 200 degrees. In most systems, all the engine coolant runs through a single output through the thermostat housing and into the radiator. In our engine, there are two outlets that then are routed to a 4-way union that houses the thermostat.


Since our radiator is in a different location and our overflow tank is not set up to be large and above the radiator and 3 different hose sizes, this setup is cumbersome and difficult to recreate. After a few days of trying to make something work out without success, my brother Larry postulated the question - why have a thermostat? After some discussion we determined we don't need one. The car will hardly if ever see engine temperature below 50 degrees - no winter salt and snow driving, so the amount of time warming up is minimal. This made the job a bit easier, but now we needed to replace that 4-way union with a 3-way with two 1.5 inch hose inlets and one 1.25 inch inlet. No standard part exists that we could find ( a week of searching), so we decided to make our own from copper plumbing parts. Also a bit tricky since most copper plumbing installations don't mix pipe diameter sizes.  After a few trips to different stores and a few designs and some flexible hoses, we have it figured out. We started with a dry build and then soldered things up. Now we will have to see if it leaks or not once we fire up the engine again.


Friday, February 3, 2017

Mods - Not Those British Gangs in the 60s

February 3, 2017

We weren't happy with the way a few things were panning out and decided to spend the time modifying them so we would feel better about the build.
The first was the drive shaft. There were two things bugging us. First, the yoke ( the end that goes in the transmission) had a lot of play and second because we moved the engine forward a few inches to get better clearance at the firewall, the yoke was exposed more than usual. 


So we went ahead and used the yoke from the Lincoln drive shaft, which we knew would have a lot less play and would marry to the seal better (yellow ring in the picture) and we sent the drive shaft after some measuring to a drive shaft fabricator to lengthen and rebalance it. Now it feels right - no play and looks normal (about an inch of visible yoke)  at the transmission. I have also included a photo of the difference in length of the old Lincoln drive shaft (minus a yoke) and the new one.


The second mod we did concerned heat transfer from the exhaust system into the passenger compartment. After installing the mufflers and thinking about the very thin sheet-metal floor we were about to install, it was becoming obvious that we would have a heat problem and possibly melting carpet. We do plan to put some heat and sound material on the floor under the carpet, but it still concerned us. So we did two more things to help mitigate the heat transfer. One is we fabricated some heat shields that will cover the mufflers and deflect the radiant heat away from the floor. We also lined the underside floor panel with the same heat shield fabric we used on the firewall. It's rated to 2000 degrees Fahrenheit. Mufflers run about 300-500 degrees so we should be better with these modifications.

The heat shields


the underside of the floor panel with the heat fabric

with the heat shield mounted, it's cut to fit around the frame x bracing

Now the floor is installed


Friday, January 20, 2017

Punch List

January 20, 2017

We are trying to get to the go kart phase - driving it without the body by the time we head out to South East Asia and Spring Training mid-Feb. Our punch list is quite large, but we are making progress. Here are some of the thing we are focused on

- Fuel lines
- Exhaust
- Air conditioning/heating 
- Radiator
- Cockpit floor, trans tunnel
- Seats and seat belts
- Steering wheel
- Bleed the brakes and install new brake fluid lines for the fluid reservoir
- Shifter
- Accelerator pedal
- Grease, oil, and fluids
- Finish electrical battery feeds

To that end, we have started on a few of these.


Exhaust Mufflers Installed

Aircon Evaporator and Heater Blower Motor
Aircon Drier and Firewall Hose Fittings
Black Braided Line is Fuel Line


Monday, January 9, 2017

Wiring 101

January 9, 2017

We have completed the wiring transplant with success! If we knew then what we know now....  this is the epiphany of where all the hours have gone and the rationalization of at least I learned something I didn't know. 

It's worth taking a bit of blog space and showing what we started out with and the steps along the way. 


Almost a year ago, mid-February 2017, we bought a 1997 Lincoln Mark VIII as a donor car for our engine, transmission and rear end for $1600 cash. We would then sell the rest and maybe try to get our money back, making the parts we use free - albeit with a ton of effort.

deconstruction under way

Finally  March 3, 2016, all the wire is out and intact.


By March 15, 2016, we have the engine and the wiring out of the car and on the floor running -we have successfully removed the donor organs!


For the next few months, we cut out wires we know we will not need for example the heated seats, radio and amplifier, power door locks and windows, headlights and tail lights, ...

Now we are left with mostly the wires we need so we can install the engine onto the frame of the 1933 Ford hot rod we are building.


May 15, 2016, the engine goes in  - it will come out a few more times, but at this point; we are thinking it's in for the final time - what little did we know. It will come out twice more to move it forward and eliminate the donor car exhaust headers that don't fit. 


We then go on to zip tie the wires we have  into more organized looms


While looking at the wires we had left, there was still an opportunity to remove more. You can see in the photo above some very big connectors, and the under the hood fuse box. We started to eliminate those and get it running on the ground once again.


Here is the final wire pared down from the original donor car by over 50 pounds.


then wrapped up for final install


some photos of it installed and running in the 1933 Ford Frame