It's been a busy couple of weeks working on the hot rod and we have made some significant progress. The highlight is getting the engine in for the final time, which was quite an effort and made us change some of our strategy regarding the build. Let me explain how things went and how it affected the build.
We spent a number of hours going one last time through the wiring to eliminate as many unnecessary wires; getting down to just what runs the engine, fuel pump and the computer. After all the work we did here it might of made more sense to just start with no wires and use the wiring diagrams to wire everything up. We still have work to do to make the wires now fit the frame we have, but the finish line is in sight.


 |
We were also not happy with the last placement of the engine as it was right up against the fire wall (we were worried about heat transfer into the cabin) and we didn't have room for the IRMC (Intake Manifold Runner Control) - this operates a butterfly valve in the intake manifold. We also did not have room for the EGR(Exhaust Gas Recirculator) pipe return from the exhaust header to the intake manifold. The purpose of both of these is to optimize the air/fuel ratio for best fuel economy and drivability. These both play a part in passing emission testing and our plan was to keep all of the emissions controls in case the car would be sold in a state which would require it for daily driving. In Illinois, our hot rod falls under the classifications of street rod custom vehicle; and doesn't require passing emission testing, so although not required, it was on our nice to have list, and we were proceeding with this plan.
So we needed to make room and move the engine forward. This required us to modify the frame motor mount brackets. Jake did most of the work here using the torch to add an additional mounting hole two inches forward. This was about all we could bring it forward since the AC air compressor would then hit the frame in the front, and we only had so much play in the length of the drive shaft to accommodate a longer path between the engine/transmission and differential in the rear end.

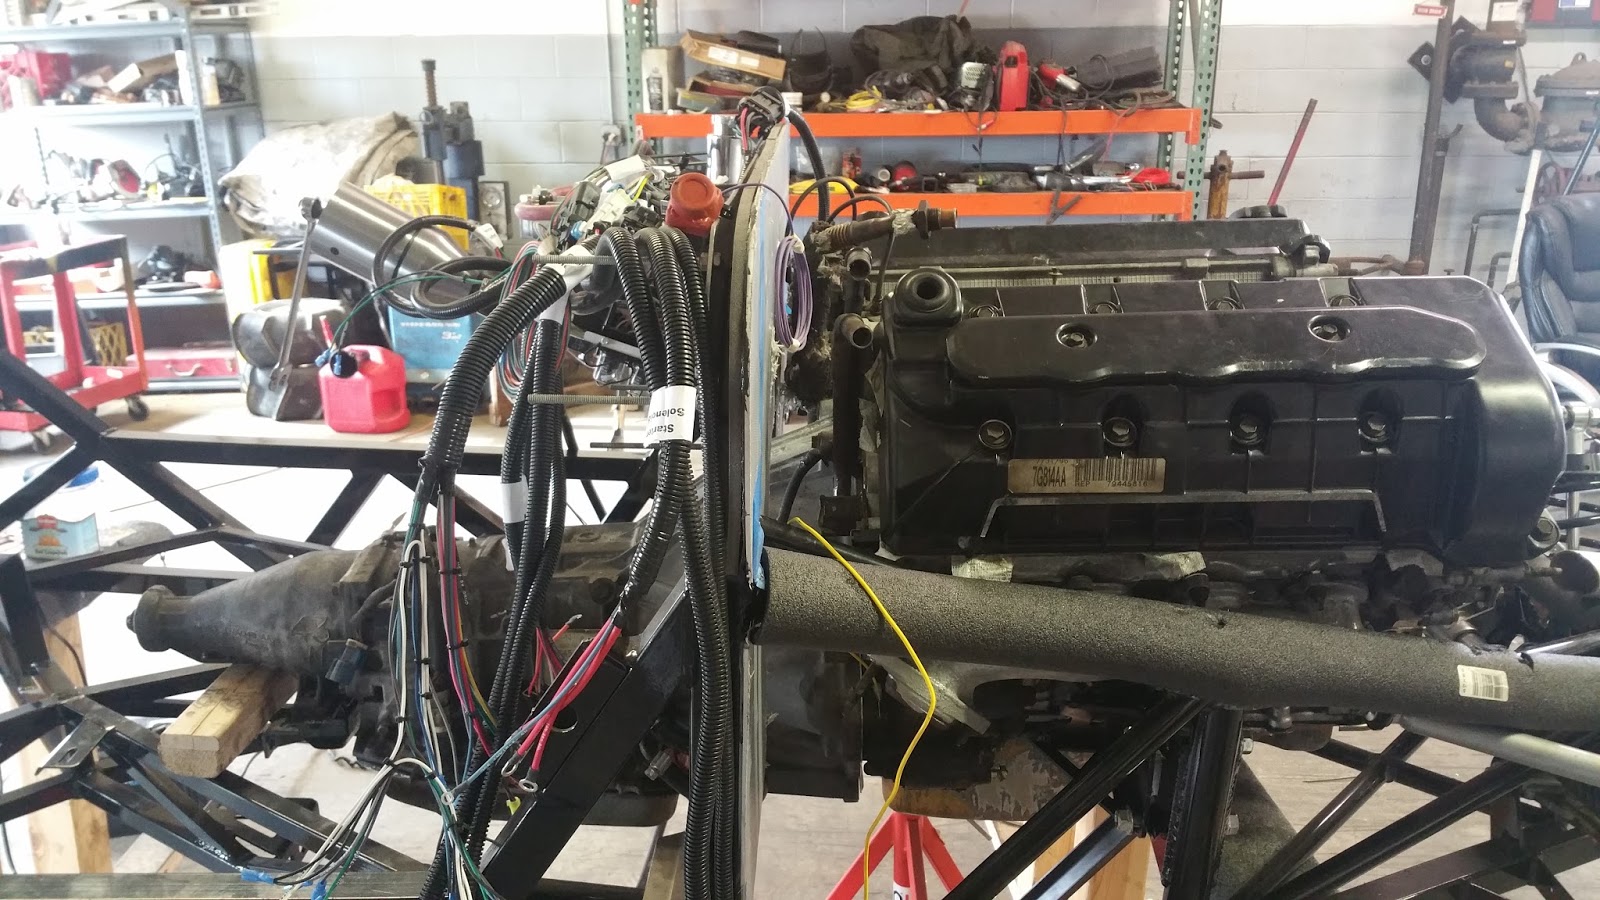
Once we had the new position on the motor mount frame mounting brackets we added the IRMC, EGR exhaust tube and the exhaust headers to the engine before we lowered it in. After about an hour of lifting and lowering the engine, snaking it's way into position, we had it in and things were looking good. David started to begin the process of putting things back on the engine. We also spent some time cleaning and painting a few of the parts we were installing so the engine could look as best as possible.


We then moved on to installing the fuel tank, the transmission mounts and the drive shaft.

For the fuel tank we had to place an aluminum panel and we did this using an aircraft system tool called Clecos for rivet placement. Whenever you look at an airplane and see the precision mounting of panels using rivets, they use this system to hold down sections of panels so every hole they drill does not move the panel, once all the holes are drilled we could remove these Celcos (temp rivets) and then apply construction adhesive and rivets. We also added a rubber mat under the fuel tank to help dampen vibration.


We ran into some trouble with the transmission mounts and driveshaft. The transmission will need a spacer and the supplied kit spacers are just too flimsy in our opinion, so we will fabricate a spacer block, also since we moved the engine up 2 inches, we need to modify the mount as well. As we tried to make the mount work we discovered that the motor mount alignment pins just missed the hole and the engine was not properly seated on the frame mounting brackets, even though we had the hold down bolt go through the adjacent hole. When looking at it further, the alignment pin fell right on the vertical support, so we had to remove the alignment pins requiring us to lift the engine up a half a foot while we did this. Of course this required us to take off the intake manifold once again - a bit frustrating, but an hour later we had the engine seated properly and the intake manifold and injector wiring harness installed.
Now that the engine was properly seated we discovered another issue. Although we had clearance for the IRMC and EGR pipe, the driver side exhaust header was binding on the steering shaft and frame. We removed a heat shield on the header, a small improvement, but it was still binding. After much heated discussion and the I told you we should have never worried about having the car pass emissions reminders, we decided to change out the headers to ones without the embedded catalytic converter. These headers have a reduced profile so the huge engine can fit into hot rod engine bays. Also most hot rodders get rid of emission so they can boost performance. Luckily we had bought some of these so we could swap out the original headers with these new chrome ones. We solved the problem, but we gave up on our 50 state sales strategy.
 |
| Old Header |
 |
| New Header |
No comments:
Post a Comment